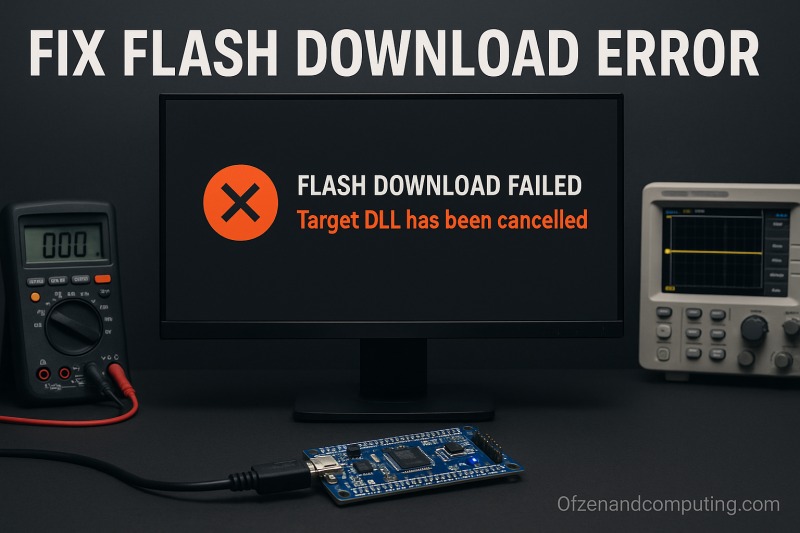
How to Fix "Flash Download Failed - Target DLL Has Been Cancelled" Error (July 2025)
If you're working with embedded development using Keil µVision, STM32CubeIDE, or similar IDEs and suddenly encounter the dreaded "Flash Download Failed - Target DLL has been cancelled" error, you're not alone. This frustrating error can bring your development to a grinding halt, preventing you from flashing your code to microcontrollers like STM32, NXP LPC, Nordic nRF, and other ARM-based devices.
I've spent countless hours debugging this issue across various projects, and I'm here to share comprehensive solutions that actually work. Whether you're using an ST-Link, J-Link, ULINK2, or CMSIS-DAP debugger, this guide will help you resolve the error and get back to programming.
Table of Contents
What Does "Flash Download Failed - Target DLL Has Been Cancelled" Mean?
This error occurs when your IDE fails to establish proper communication with the target microcontroller during the flash programming process. The "Target DLL" refers to the dynamic link library responsible for handling the communication between your IDE and the debug probe. When this process is "cancelled," it means the flash download operation was interrupted or couldn't complete successfully.
Common Scenarios When This Error Appears
- After disconnecting and reconnecting your development board
- When switching between different projects or code
- Following firmware updates to your debugger
- After enabling low-power modes in your code
- When using certain GPIO configurations that interfere with SWD/JTAG pins
- During initial setup with a new development board
Root Causes of the Error
Understanding why this error occurs is crucial for implementing the right fix. Here are the primary culprits:
1. Connection Issues
- Poor USB cable connections
- Damaged or low-quality USB cables
- USB driver conflicts or outdated drivers
- USB 3.0 compatibility issues
2. Debugger Configuration Problems
- Incorrect debugger selection in IDE settings
- Mismatched debug interface settings
- Wrong reset configuration
- Incorrect clock settings
3. Target Device Issues
- Microcontroller in low-power mode
- SWD/JTAG pins reconfigured in code
- Corrupted flash memory
- Locked or protected flash regions
4. Software Configuration
- Missing or incorrect flash programming algorithm
- Outdated IDE or debugger firmware
- Conflicting device support packages
Comprehensive Solutions Guide
I'll walk you through multiple solutions, starting with the quickest fixes and progressing to more advanced troubleshooting methods.
Solution 1: Change Connection Settings (Quick Fix)
This is often the fastest solution that works for many developers:
- Open your IDE's debug settings
- Navigate to the debugger configuration
- Change the connection mode to "Connect Under Reset"
- Select "Reset Type" as "Hardware Reset" or "SYSRESETREQ"
- Try flashing again
The "Connect Under Reset" option forces the debugger to hold the microcontroller in reset while establishing the connection, which prevents any problematic code from interfering with the debug interface.
Solution 2: Verify and Update Debugger Selection
Ensure you're using the correct debugger for your hardware:
- Check your physical debugger (ST-Link, J-Link, ULINK2, etc.)
- In IDE Debug Settings:
- For ST-Link: Select "ST-Link Debugger"
- For J-Link: Select "J-Link / J-Trace Cortex"
- For ULINK2: Choose between "ULINK2/ME Cortex Debugger" or "CMSIS-DAP"
- Match the settings in both Debug and Utilities tabs
Solution 3: Flash Algorithm Configuration
Make sure a valid flash programming algorithm is selected in your IDE's flash configuration menu.
- Go to Flash -> Configure Flash Menu Command
- Verify the correct flash algorithm is selected for your MCU
- Check these settings:
- Programming Algorithm matches your chip
- RAM for Algorithm has sufficient size
- "Verify Code Download" is checked
- "Download to Flash" is selected
Solution 4: Reset Configuration Fix
This error is mainly caused by reset settings - selecting "SYSRESETREQ" in Reset settings often resolves the issue.
- Open Target Options -> Debug -> Settings
- In "Cortex-M Target Driver Setup"
- Change Reset to "SYSRESETREQ" instead of "Autodetect"
- Apply changes and retry
Solution 5: Boot Mode Recovery (Advanced)
If basic solutions fail, try boot mode recovery:
- Locate the BOOT0 pin on your board
- Pull BOOT0 HIGH (connect to VDD)
- Reset the board
- Use your IDE's Flash -> Erase option
- Return BOOT0 to LOW
- Try programming again
Pulling BOOT0 High forces the microcontroller into system bootloader mode, allowing you to erase problematic code that might be blocking debug access.
Solution 6: Driver and Firmware Updates
Outdated drivers are a common culprit:
- Update debugger drivers:
- Download latest drivers from manufacturer
- Uninstall existing drivers completely
- Install fresh drivers
- Restart your computer
- Update debugger firmware:
- Use manufacturer's utility (ST-Link Utility, J-Link Configurator, etc.)
- Follow firmware update procedure
- Verify firmware version after update
Solution 7: USB and Cable Troubleshooting
Don't underestimate hardware issues:
- Try different USB cables (preferably short, high-quality ones)
- Use USB 2.0 ports instead of USB 3.0
- Connect directly to computer (avoid USB hubs)
- Check Windows Device Manager for driver errors
Solution 8: IDE-Specific Solutions
For Keil µVision:
- Update to latest Device Family Pack (DFP)
- Some users report success using version 2.2.0 of device support packages for certain controllers
For Nordic nRF devices:
- Reinstall nRF5x-Command-Line-Tools and check the box to replace JLinkARM.dll
For STM32CubeIDE:
- Try STM32CubeProgrammer as an alternative
- Use ST-Link Utility for direct flash operations
Solution 9: Code-Related Fixes
Your code might be causing the issue:
- Check for code that reconfigures SWD/JTAG pins
- Avoid immediate entry into low-power modes
- Add a delay at the beginning of main(): int main(void) { // Add 2-second delay for debugger connection for(volatile int i = 0; i < 2000000; i++); // Your code here}
Solution 10: Nuclear Option - Complete Reset
If all else fails:
- Use manufacturer's specific tools:
- STM32: STM32CubeProgrammer or ST-Link Utility
- NXP: MCUXpresso or Flash Magic
- Nordic: nRF Command Line Tools
- Perform full chip erase
- Verify chip is completely blank
- Try programming a simple LED blink program first
Platform-Specific Considerations
STM32 Devices
- Use STM32CubeProgrammer for stubborn cases
- Ensure NRST pin is properly connected
- Check option bytes haven't locked flash regions
NXP LPC Series
- Consider switching to MCUXpresso IDE if Keil continues to fail
- Verify crystal frequency settings match hardware
Nordic nRF Series
- Ensure SoftDevice compatibility
- Check if bootloader needs updating
Preventive Measures
To avoid encountering this error in the future:
- Always disconnect debugger properly before unplugging
- Avoid modifying SWD/JTAG pins in your code
- Add startup delays in production code
- Keep drivers and firmware updated
- Use quality USB cables and connections
- Document working configurations for your setup
Common Mistakes to Avoid
- Don't immediately assume hardware failure
- Avoid using USB 3.0 ports without testing USB 2.0 first
- Don't skip checking simple things like cable connections
- Never force firmware updates during active debugging
- Don't modify boot configuration pins without understanding implications
Advanced Debugging Tips
If you're still stuck:
- Enable verbose logging in your IDE
- Use command-line tools for more detailed error messages
- Check debug probe LEDs for status indicators
- Monitor USB communication with tools like USBView
- Try different computers to rule out system-specific issues
When to Seek Hardware Replacement
Consider hardware issues if:
- Multiple confirmed working setups fail with your device
- Physical damage is visible on debug probe or target
- USB connection errors persist after driver reinstalls
- Debugger works with other boards but not yours
Conclusion
The "Flash Download Failed - Target DLL has been cancelled" error can be frustrating, but it's almost always solvable. Start with the simple solutions like changing connection settings and verifying debugger selection. If those don't work, systematically work through the more advanced solutions.
Remember, the most common fix is simply changing to "Connect Under Reset" mode and ensuring proper reset configuration. Don't overlook basic issues like cable quality and driver updates. With patience and methodical troubleshooting, you'll be back to flashing your code in no time.
Frequently Asked Questions
What is the quickest fix for "Flash Download Failed - Target DLL has been cancelled"?
The fastest solution is often changing your debugger connection settings to "Connect Under Reset" and setting the reset type to "Hardware Reset" or "SYSRESETREQ" in your IDE's debug configuration.
Why does this error suddenly appear when my setup was working before?
This error commonly appears after disconnecting and reconnecting your board, updating firmware, or when your code enters low-power modes or reconfigures the debug pins. USB driver updates or cable issues can also trigger it suddenly.
Can a bad USB cable really cause this error?
Yes, absolutely. Poor quality or damaged USB cables are a surprisingly common cause. The data lines in cheap cables can degrade, causing intermittent communication failures that manifest as this error.
Do I need to replace my debugger if this error persists?
Not necessarily. Try all software solutions first, including driver updates, different computers, and alternative programming tools. Hardware failure is less common than software configuration issues.
Is this error specific to certain microcontroller families?
No, this error can occur with any ARM-based microcontroller including STM32, NXP LPC, Nordic nRF, and others. The solutions are generally similar across platforms, though specific settings may vary.
Can antivirus software cause this error?
Yes, some antivirus programs can interfere with debugger communication. Try temporarily disabling your antivirus or adding your IDE and debugger tools to the exception list.
Why does the error occur more frequently with custom boards?
Custom boards may have issues with power supply stability, incorrect crystal configurations, missing pull-up resistors on debug pins, or poor PCB layout affecting signal integrity. Verify your hardware design matches reference designs.
Should I use CMSIS-DAP or vendor-specific debug modes?
While CMSIS-DAP provides compatibility across different debuggers, vendor-specific modes like ULINK2/ME often provide better features like Serial Wire Viewer (SWV) support.
How can I prevent this error in production firmware?
Add a startup delay before initializing peripherals that might interfere with debugging, avoid immediate entry into low-power modes, and never reconfigure the SWD/JTAG pins unless absolutely necessary.
What's the difference between software reset and hardware reset?
Software reset (SYSRESETREQ) uses the ARM Cortex-M system reset request, while hardware reset toggles the physical NRST pin. Hardware reset is more thorough but requires proper NRST connection on your board.